Although Donedesk is designed to do TRO, some few settings need to be activated or re-activated. Take a few minutes to be sure Donedesk is ready.
Expand Menu
Expand Menus
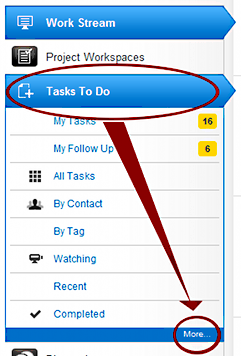
By default, Donedesk shows simple task menus. You need the full options.
- Click the large blue Tasks to Do menu item (on the left side, under the black quick entry scratchpad). Then click More… (in the small blue bar at the bottom). Six new options appear.
Complete User Profile
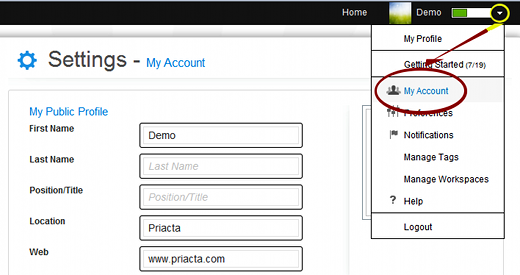
Completing your profile, including a picture, will make other people take your requests seriously and keeps your information secure. Click the down triangle next to your name (upper-right corner), select My Account, and do the following:
- Set your password. Some people initially access Donedesk via email links. If you have not yet set your password, do so now. Click Save New Password.
- Set your display picture, if you have not done so already. A professional picture of you is ideal, but even a picture of a beach, a mouse, or Van Gogh will help people identify tasks to or from you in their lists. Click Change Display Picture to upload a photo.
- Fill in personal information, including first and last names, and your title.
- Add other email addresses. Sooner or later, people will send Donedesk requests to your other email addresses. Adding them here will make all your tasks appear in one Donedesk profile so nothing gets lost.
- Click save. This works better if you click before browsing away from the page.
My Account Settings
Email to Tasks
You can forward emails to Donedesk, turning them into tasks. You can also send an email to someone, including Donedesk as a BCC recipient, in which case Donedesk will record the task and extract the To: recipient as the person doing the task. CC: recipients will be added as watchers (or use these email shortcuts).
- Click the down triangle next to your name at the upper-right corner of the screen:
 and select My Account.
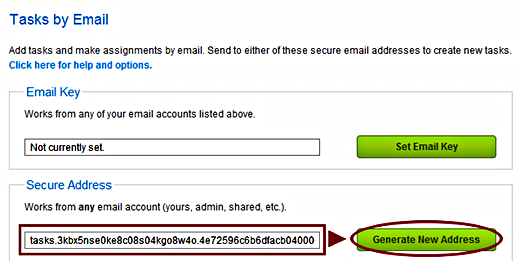
 - Find the Tasks By Email heading. Next to Secure Address you should see a long string of text ending in @donedesk.com. If you do not see text, click Generate New Address.
- Highlight the long string of text and copy it by clicking Ctrl+C (Option+C on a Mac).
- Open your primary email manager and create a new contact called “Donedesk”. Press Ctrl+v (Option+v on a Mac) to paste the string in as Donedesk’s email address.
- Create a SECOND contact called “Justme Donedesk”. Press Ctrl+v (Option+v on a Mac) to paste the string in as Donedesk’s email address, then edit the start of the email address, changing “tasks.” to “justme.” to create the new email address.
- (Optional for now) Learn how to use these email addresses in this article.
Email to Task Setup
In other words, the Secure Address is a contact email address in your email manager. This makes it easy to forward tasks to Donedesk by typing “Donedesk” as the email recipient. (See this article for an explanation of Email Key and Secure Address.)
Preferences
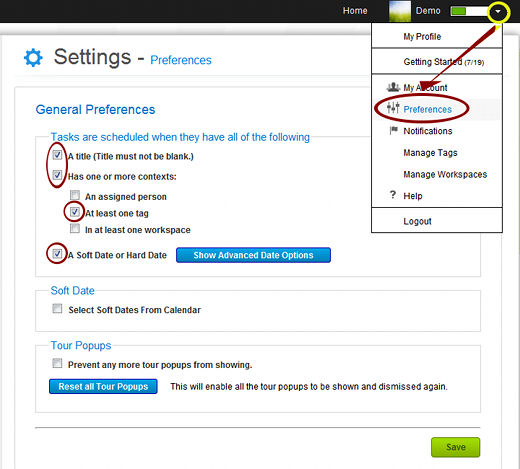
Click the down-triangle next to your name (upper-right corner), and click Preferences. Check to be sure your preferences are set to the following:
- Check: A Title (Title must not be blank)
- Check: Has one or more contexts
- Uncheck: An assigned person
- Check: At least one tag
- Uncheck: Select Soft Dates from Calendar
You may choose to continue seeing the pop-up tour or suppress it as you wish.
General Preferences
Notifications
Click the down-triangle next to your name (upper-right corner) and click Notifications. Which notifications you receive–if any–are up to you. We recommend a daily digest, a single email with important task updates. Selecting the HTML option will allow you to respond to everything inside the email, without going to Donedesk.
Email and Notification Settings
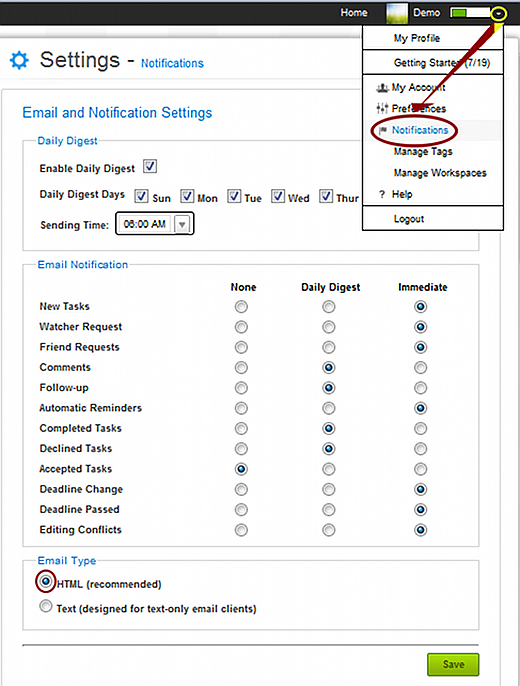
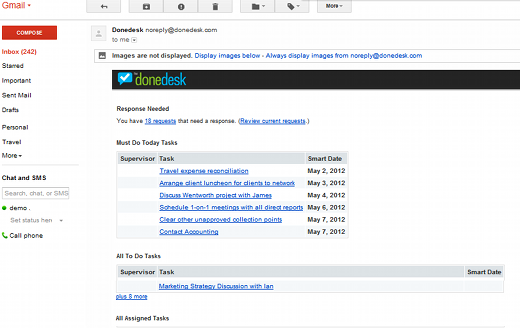
Daily digest emails will remind you to do a daily review.
Daily Digest
Recent Comments