Follow these steps to configure Nozbe effectively for TRO:
- Log in to Nozbe Classic:
- Go to: https://webapp.nozbe.com/.
- Populate fields with your login details.
- Click Log me in!.
- Delete the default tasks and contexts created by Nozbe.
- Disable the email notification feature:
- Click
 at the right portion of the screen.
 - Click Email Notifications
- Uncheck the box
- Click

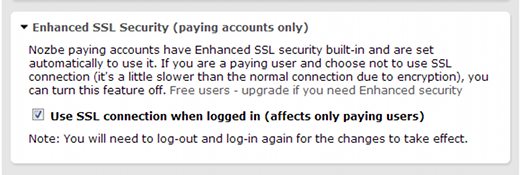
For privacy and security reasons:
- Enable the Enhanced SSL Security (paying accounts only) feature:
- Click Enhanced SSL Security (paying accounts only)
- Check Use SSL Connection when logging in (affects only paying users)
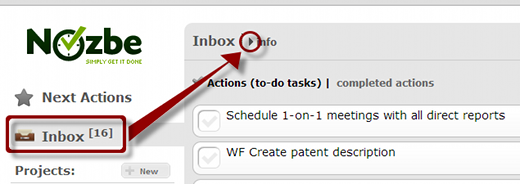
On the left side of the screen, change the name of your Inbox to My Tasks:
- Click Inbox
- Click
 (top of screen, beside where it says “Inbox”)
 - Click
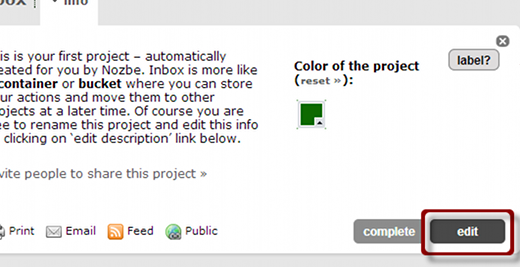
 .
. - Change the name from Inbox to My Tasks.
- Click Save.
click edit
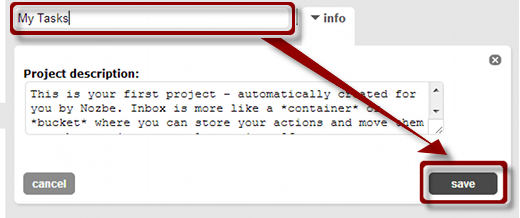
enter My Tasks, then click save
Add soft dates to your Contexts list.
- Next to the Contexts header (bottom-left), click +New.
- Add the following contexts:
- This Week
- Next Week
- This Month
- Next Month
- S/M (Someday/Maybe)
- For each soft date, select the clock icon. This will help you quickly find your soft dates.
All other TRO setup (such as adding contexts) will happen during the course of your TRO training.
Recent Comments