Delegation = Asking
To delegate, just ask them if they will do it. Asking allows them to say “yes,” which increases buy-in. If they have concerns, it makes it safe to discuss them, so you get a good handoff instead of a fumble.
Delegate an Assignment
1. Ask them to do it.
If you can ask them in less than 2 minutes, do it now (email, phone). Otherwise, the next step is Ask [person] to [action].
- Ex: Ask John to create patent description
When you are able to ask, tell them what the look, feel, purpose, and reasons are for the task/project. Listen to what they think you are asking them to do, and clarify. Good communication will ensure that the right task is accomplished with minimal supervision.
2. Assign the task using Astrid (recommended, optional).
Astrid politely invites others to collaborate (“Friend request”) and to work on the task you sent them. Even so, use this feature only if you have a relationship of authority or trust with that person.
- Click on a task.
- In the task edit pane (right side), click the field next to Who.
- Select Someone else….
- Type the name or email address of the person you want to assign this task to.
- Press Enter.
Assign tasks in Astrid
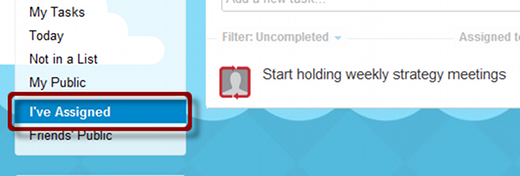
See a list of tasks that you assigned by clicking on the I’ve Assigned menu (upper-left pane).
See a list of tasks shared in any way with one of your contacts by clicking a name in the People (lower-left) pane. This includes tasks you assigned, received, or share with others.
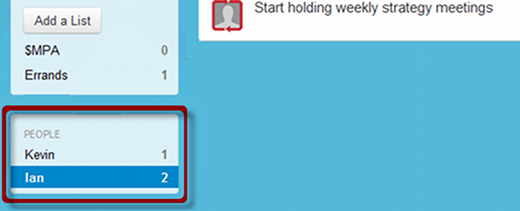
Astrid automatically adds people that you share tasks with.
3. Track the assignment in their 1Person list (if you assign to them or talk with them regularly).
This gives you a complete agenda of things to discuss when you talk with them later. Just look in the 1-1 context list. No need to consult more than one list.
- Click on a task.
- In the task edit pane (right side), click Add another list… next to Lists.
- Enter or choose the 1-1 context as the list name (like 1Fred or 1Sue).
4. Use the W/F flag and smart dates to help you follow up.
When you delegate, the next step changes. “Ask [person] to [action]” becomes “[Person] will [action],” and you mark it as a Waiting For step. Then you schedule it with your follow-up dates as the smart dates. (If you haven’t heard back by then, you will take action.) This method ensures that the task always moves forward.
- Click on the task.
- Edit the next step. Change it from “Ask [person] to [action]” to “{Person] will [action].”
- In the task edit pane (right side), click Add another list… next to Lists.
- Enter or choose the WF list to flag it as a Waiting For step.
- Set the follow-up dates as the smart dates.
Waiting For steps will be explained more in the next lesson.
Special Rules for Assigned Tasks in Astrid
- In Astrid, task recipients see the same smart dates you do, so your follow-up dates are their action dates. Choose your dates accordingly, and give them an extra day or so before actually following up.
- Astrid follows up automatically if you assign the task via Astrid.
- In Astrid, assign a W/F flag by adding the task to the WF list. Do not add
“W/F” in the task name as you do with some other task lists. (Tasks titles are shared, and it would confuse the recipient to see “W/F” in the task name they are supposed to be doing it.) - Astrid does not share list names. Only you will see the W/F flag if you set it using a list.
Recent Comments